We’re pretty lucky when you think about it. We live in a magical time where anyone can shoot high-quality video footage with the phones in our pocket. Even ten years ago the current capabilities would have been considered insane and impossible, but we’ve got this hugely competitive filmmaking tool in many of our pockets. And while these cameras are very capable on their own, we can get even better performance out of them with a small amount of extra equipment. In this guide, we’re going to walk through everything you need to put together the best iPhone video kit for your needs and get you going on making great videos.
Contents
- 1 Best smartphone camera for video in 2020: iPhone
- 2 Best iPhone lenses for filmmaking and video: Moment iPhone lenses
- 3 Best filters and filter mounts for iPhone video and Moment lenses
- 4 Best gimbal for iPhone video for most people: DJI Osmo Mobile 3
- 5 Best gimbal for iPhone video with most external lenses/filters: Zhiyun Smooth 4
- 6 Best gimbal for iPhone video with large external lenses/filters: Freefly Movi Cinema Robot
- 7 Best non-gimbal phone grips or stabilizers for iPhone video
- 8 Best portable battery for iPhone video kits
- 9 Best bags for iPhone video kits
- 10 DSLR vs phone camera
- 11 Best iPhone video app: Filmic Pro
- 12 Best iPhone/iPad video editor: LumaFusion
- 13 Making movies with iPhone
- 14 What gear would you need for iPhone video and filmmaking?
- 14.1 Lenses
- 14.2 Stabilizers, gimbals, and grips/cages
- 14.3 Neutral density (ND) and variable neutral density (VND) filters for iPhone video
- 14.4 Circular polarizers (CPL) for iPhone video
- 14.5 Do you need a UV filter for your iPhone video kit?
- 14.6 Filter mounts for iPhone video
- 14.7 iPhone video recording and editing software
- 14.8 Portable battery bank
- 14.9 Camera bag
- 15 What next: Learning iPhone video and filmmaking with online courses and trips
- 16 Final thoughts
Best smartphone camera for video in 2020: iPhone
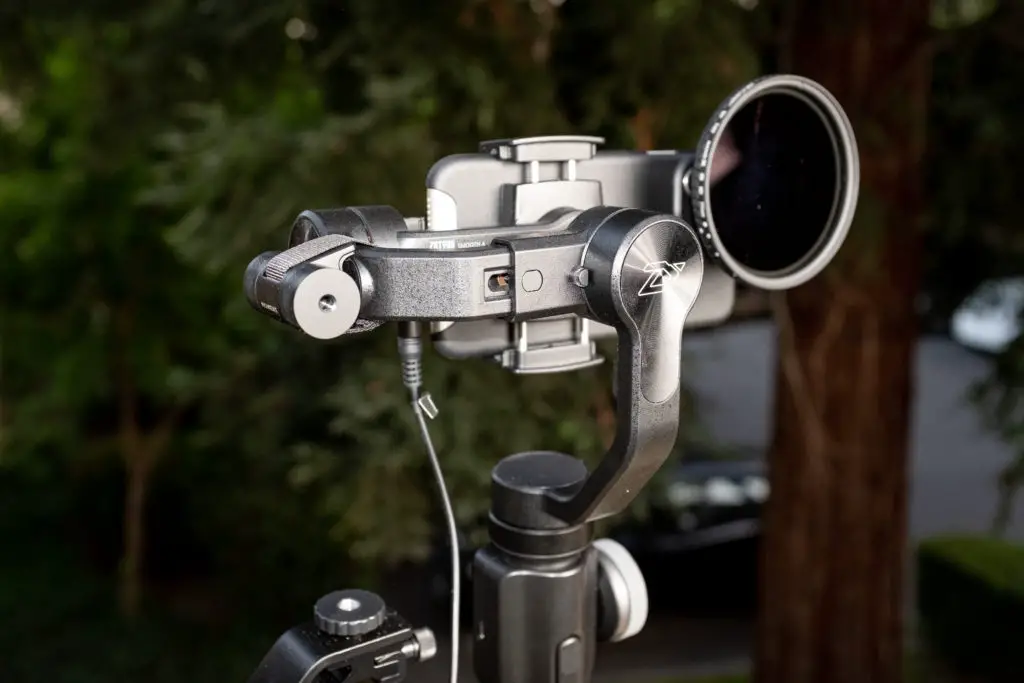
As much as it pains me to say this as a life-long Android user up until last year, the iPhone is hands down the best smartphone video camera available today. It’s mostly because there are fewer headaches with an iPhone, such as less overheating issues and the ability to shoot at higher frame rates and resolutions without causing dropped frames (or just using these settings at all). That’s really due to software optimization on iOS and the absolute beast that is the camera module in modern iPhones.
But what about quality? The iPhone still beats out pretty much any Android handset out there in at least one or more key components, and image processing in video on modern iPhones is undoubtedly unmatched.
Yes, the new Samsung S20 Ultra can shoot 8K. It’s okay. Yes, the 4K and 1080p look great on the same phone, but there’s still just a lack of polish with the video experience on Android compared to iPhone.
Android phones are definitely catching up (I still think the Pixel is at least as good—if not a hair better—at still photos and night mode shots), but I think we have a few years to go before video quality on an Android is one-to-one comparable to iPhone video.
Oh, and not to mention the fact that certain manufacturers (like Samsung) lock the full potential of the camera away behind a closed-off API, so you can’t shoot 4K in third-party apps with LOG or any other advanced settings—something that’s often quite useful to getting great smartphone video.
Best iPhone lenses for filmmaking and video: Moment iPhone lenses
While the cameras on current iPhones are quite excellent, they don’t always get the right field of view or focal length. That’s where Moment lenses come in—they’re specially designed to fill in the gaps left by the camera lenses on phones to create more cinematic and photogenic focal lengths while not degrading the image quality.
We’ll be honest, Moment lenses aren’t cheap. They’re quite worth their cost, however, as they are solidly built and optically as good as one could hope for, within reason. Moment lenses have their own mounting system, much like an interchangeable lens camera does. The current mount is called the M-mount, with the O-mount being the older preceding version. This means that there needs to be something to which the lens can mount. The best way to do this is with one of Moment’s cases, which we’ll cover, uh, momentarily (see what I did there?).
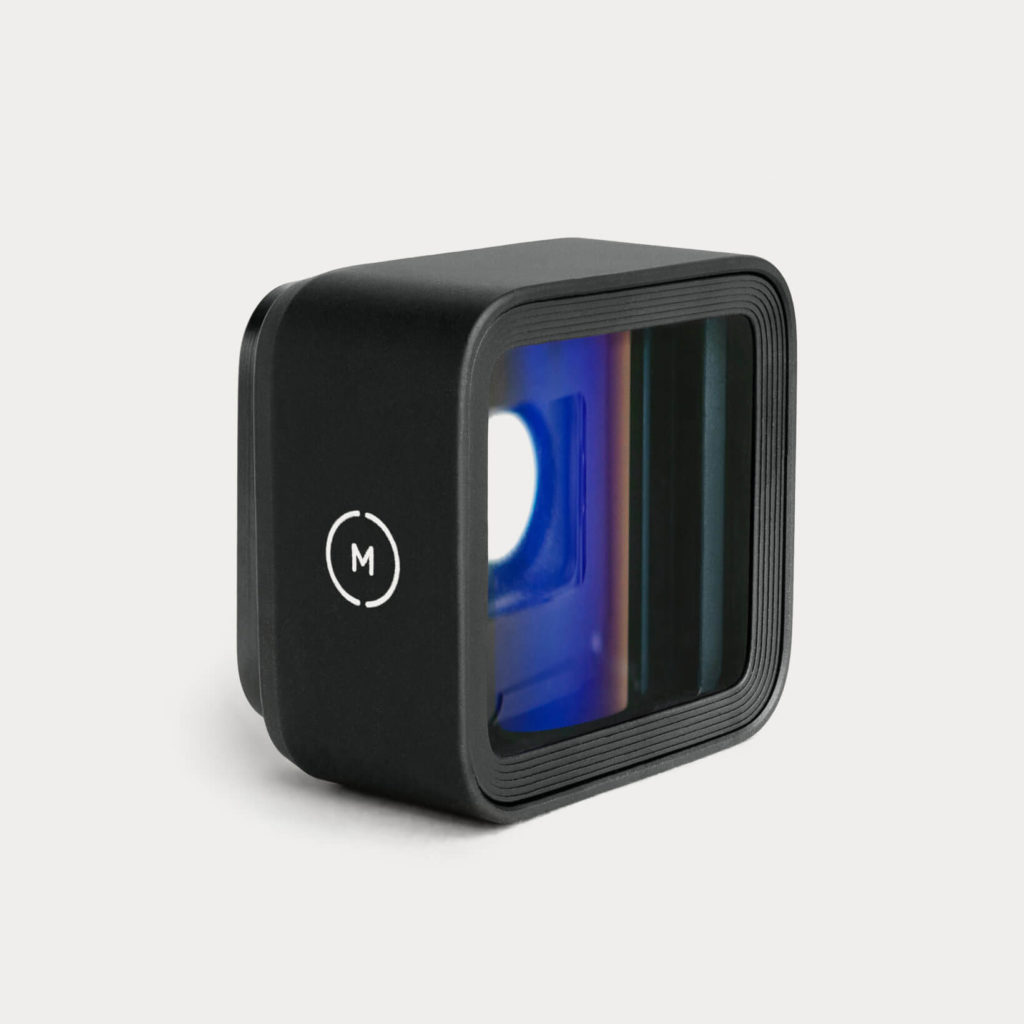
Best “fancy” lens: Moment anamorphic lens
While Moment has made a good handful of great lenses, the one that I really love is the Moment anamorphic lens. This is a 1.33x anamorphic lens, meaning that it will create a 2.40:1 aspect ratio image squished into the 16:9 (1.78:1) ratio of the iPhone’s camera. basically, it creates an aspect ratio that is roughly 33% wider than a 16:9 widescreen image.
That means that the footage will look compressed and weird until it’s desqueezed either by the recording app or in post in your editor. Filmic Pro does support the Moondog Labs anamorphic lens by name, but both the Moondog Labs lens and the Moment lens are 1.33x anamorphic lenses, so they work identically as far as the app is concerned.
The Moment anamorphic lens is really something special, in our opinion. The visual quality is quite great, and the feel that you get from this lens is just, well, impressive. Lens flares are beautifully enhanced and cinematic, and the optical character of the lens just feels so good. If you were to get only one Moment lens and wanted to get experimental with your videos, we can easily suggest their anamorphic lens as the first purchase.
Best useful lenses: Moment wide-angle and fisheye lenses
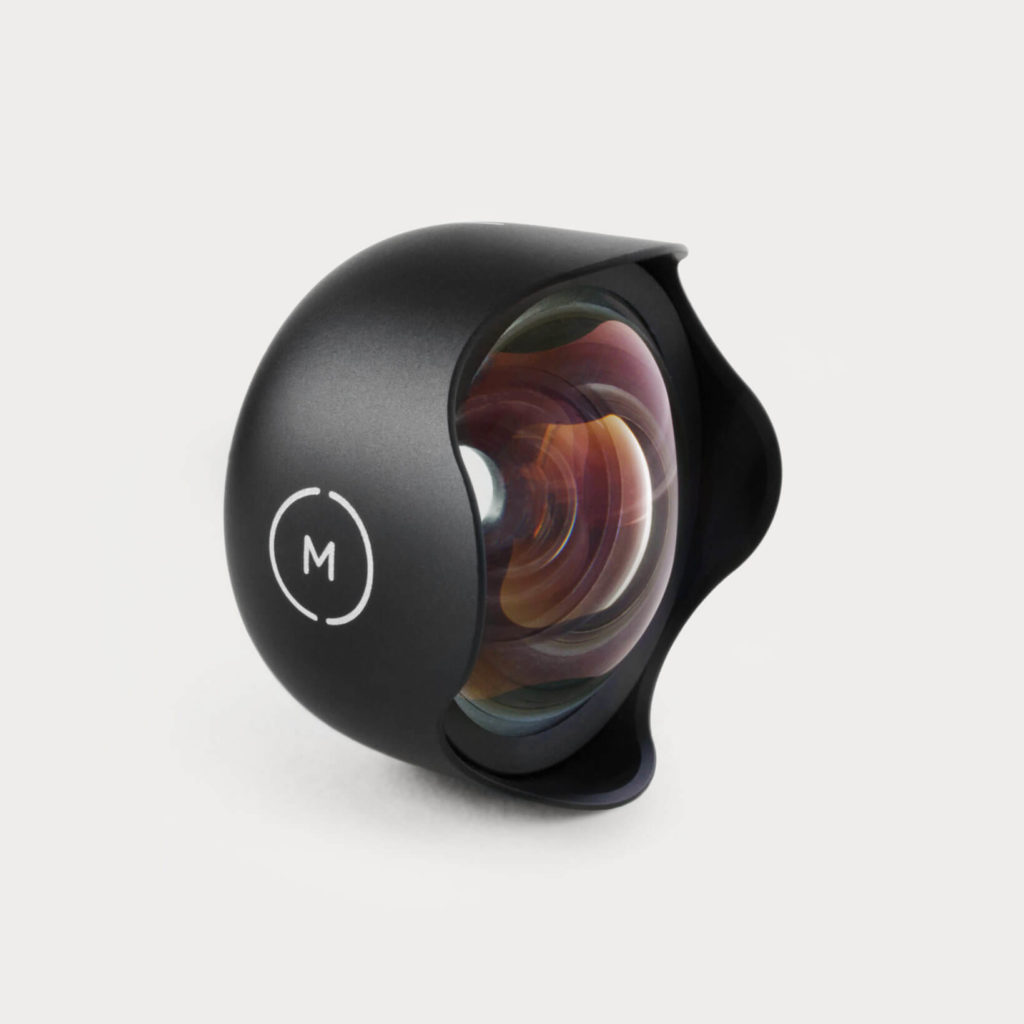
You may be thinking that, since you have an iPhone 11/Pro/Max or similar phone, you already have an ultrawide lens. Well, yes, you do. But technically that ultrawide lens isn’t as good as the main wide or even the tele shooters. Moment’s wide and ultrawide lenses allow you to use your best lens on the camera and still capture the whole scene.
Their staple wide-angle lens is the Moment Wide 18mm lens. This is a great replacement for the lower quality ultrawide on your phone, allowing you to use portrait mode and night mode with a wide field of view.
This is an indispensable lens for a lot of iPhone videographers, as it’s just immensely sharper and useable than the built-in ultrawide. No, it may not have the outright sex-appeal of the anamorphic, but this lens is absolutely worth every penny because of how often you’ll actually reach for this lens when you need to capture a wide field of view without fisheye distortion.
Speaking of, Moment does make some great fisheye lenses. They’re arguably less used than the wide and tele lenses, but when you’re working in a very confined space and need a full room view a fisheye is a great tool. Fisheye lenses do have a particular vibe, however, so they’re not always appropriate but they can be immensely fun to work with.
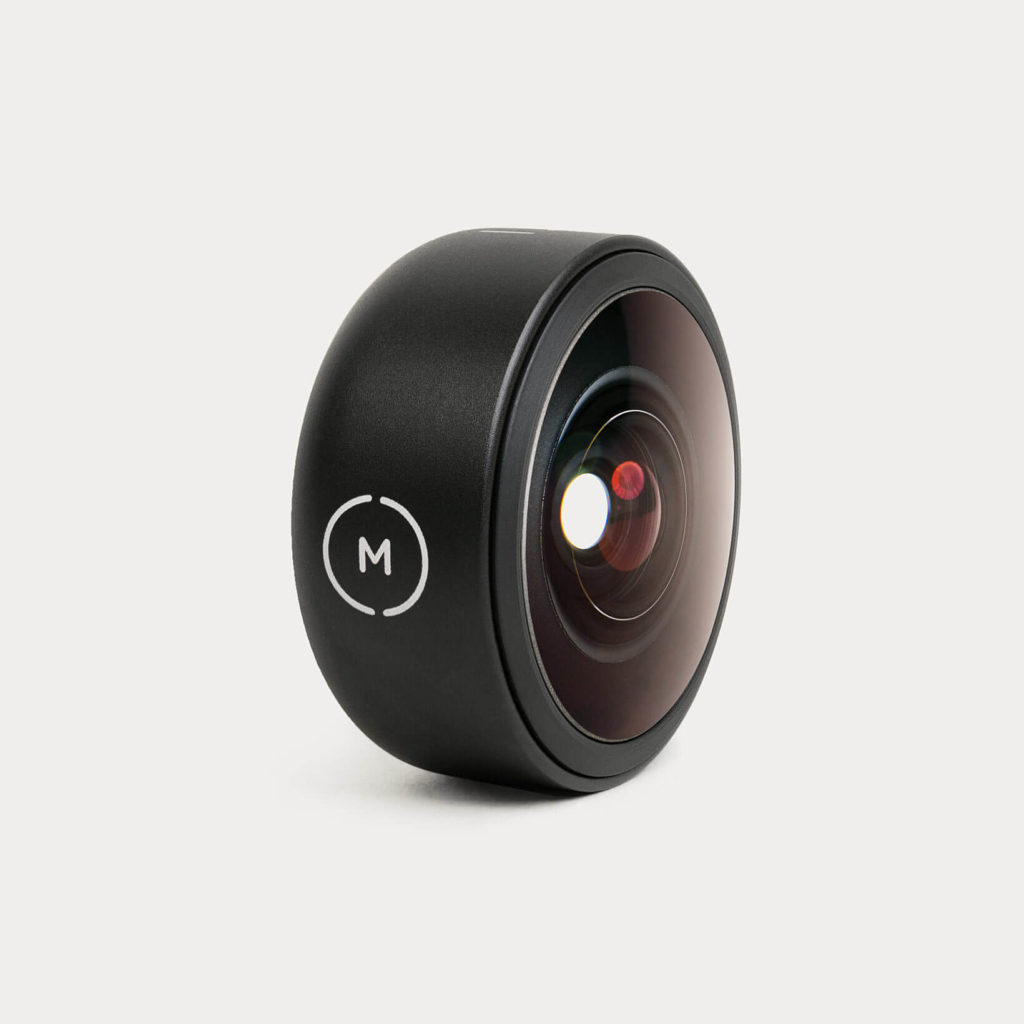
For those with 2018 iPhones and earlier (iPhone Xs and before) you’ll want to get the Fisheye 15mm lens. With the iPhone 11 came a redesign in focal lengths and you’ll want to pick up the Fisheye 14mm lens for 2019 and later iPhones (this may change in 2020, but keep it in mind).
Best portrait/zoom lenses: Moment tele and macro lenses
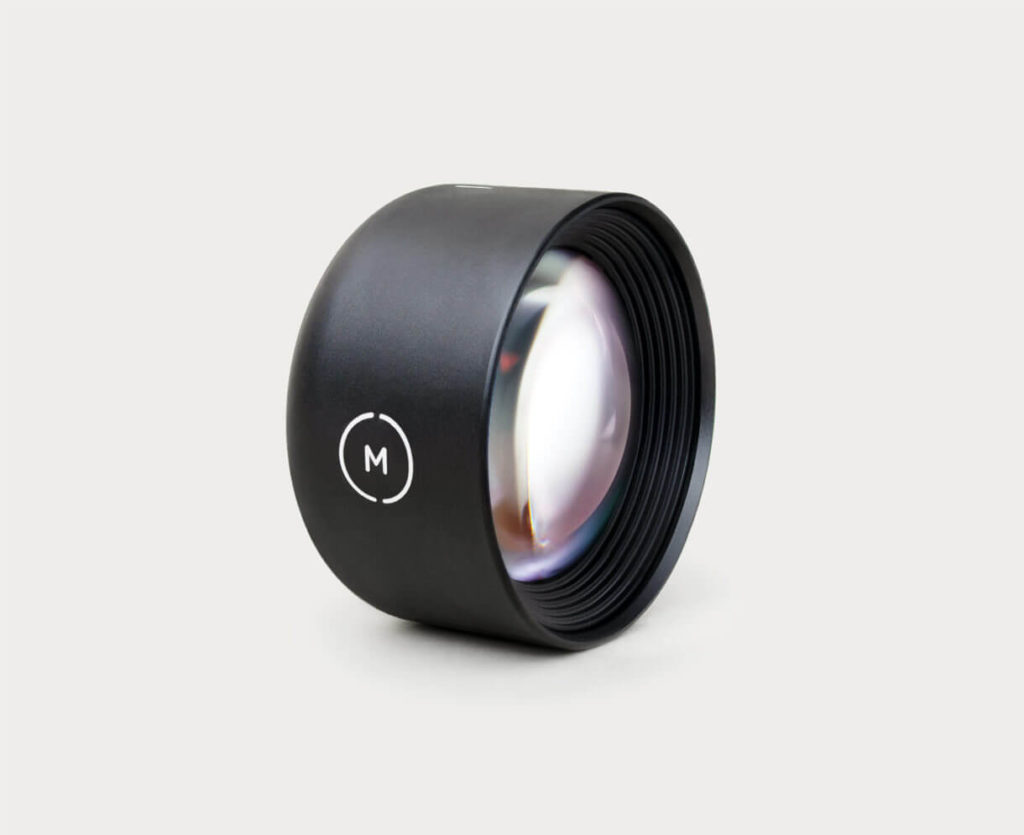
Rounding out the Moment “holy trinity”, in our opinion, is the Moment Tele 58mm lens. Again, yes, you have a tele lens in the iPhone 11 Pro and Pro Max, but again it’s a bit of a lower quality lens than the main wide shooter.
Alternatively, if your built-in tele lens isn’t zoomed in enough, you could stack the Tele 58mm lens on your built-in tele and get basically a 4x zoom from your main wide shooter.
The Tele 58mm lens is a really great portrait-style lens. Coming from the photography world, we would usually like longer lenses, such as an 85mm, 104, or even 200mm lens for portraits that create great separation between the subject and the background due to background compression caused by longer focal length lenses.
The Moment Tele 58mm works the same way. No, you won’t get as much in view at the same time, but it draws a strong emphasis on your subject because of the background compression and can definitely help tell a story in an opposite way from a wide shot.
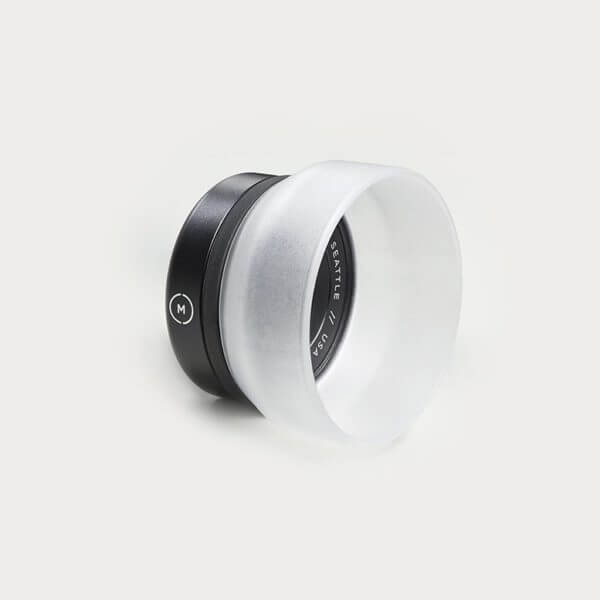
The extreme end of this would be the Moment Macro 10x lens. You probably won’t be using this for much, but if you need to get very close to something very small, this lens is absolutely the way to go.
The Macro lens is great for photo and video and even comes with a diffusion hood for getting great light while practically on top of your subject. If you like shooting tiny details, you’ll want this lens. It may not get used by the majority of videographers, but those who do need one can’t go wrong.
Moment iPhone cases
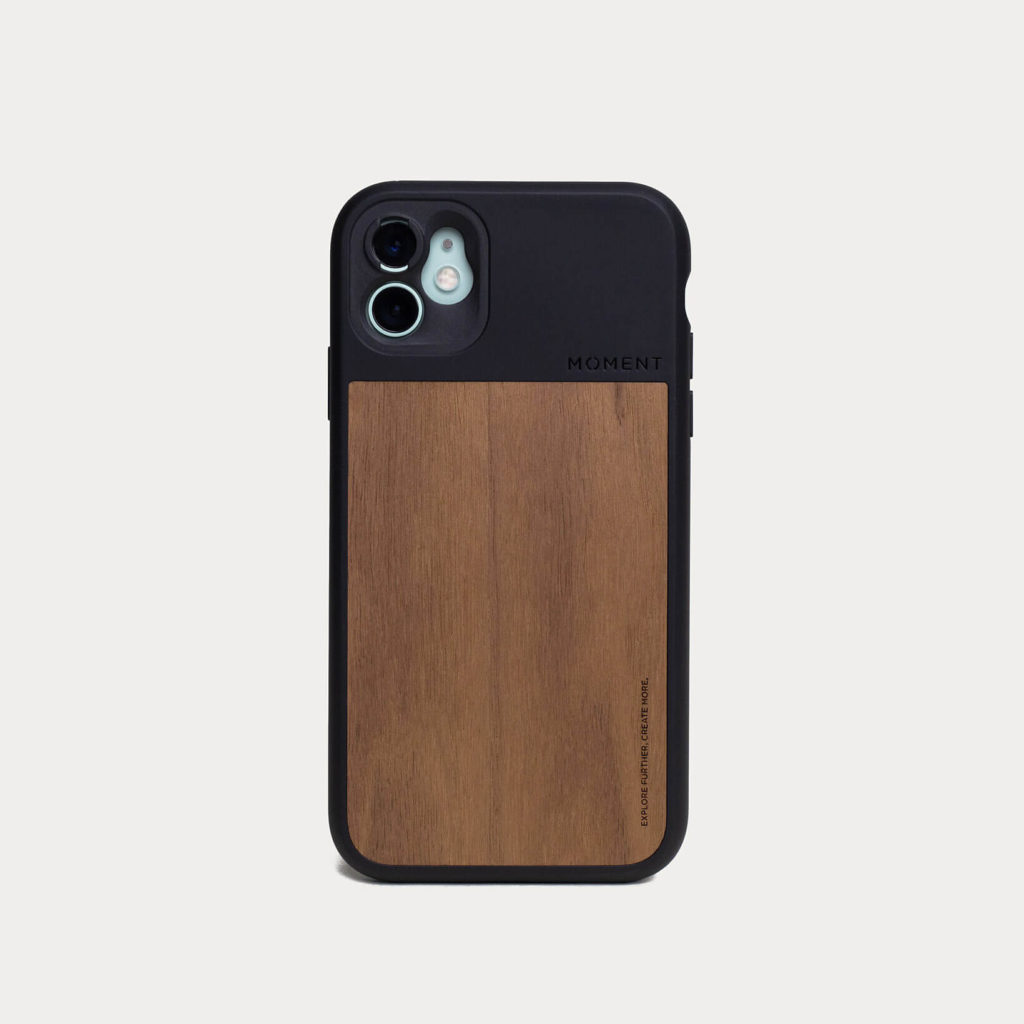
The Moment lenses are great, of course, but they still need to be mounted onto something. They do have some universal-style mounting brackets, but these really aren’t the best way to go. We’d suggest getting a Moment case for your phone of choice.
Moment currently has four different cases, with three of them containing M-mounts. Their most protective case is now simply called “The Case“, although it was previously their “Photo Case”. I’ve been using this case in the wood paneling version on my iPhone 11 since I picked it up last year, replacing my Otterbox Commuter case (a case which I’ve loved for years on several devices). It’s a very durable case that provides excellent protection against drops and still fits in more modern gimbals with a bit of a stretch.
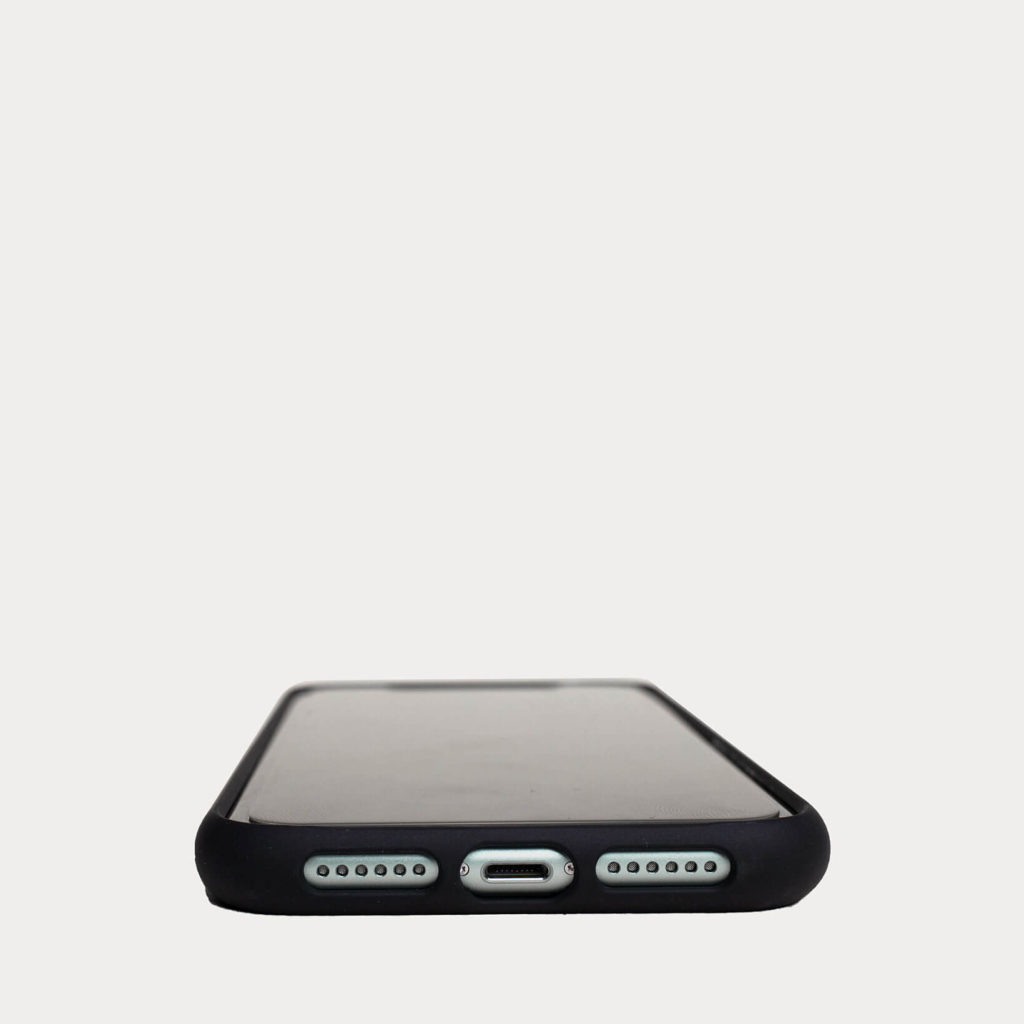
The next case is their “Thin Case“, or “Thin Photo Case”. It’s basically just a slimmer version of the more bulky Photo Case, similar to an Otterbox Symmetry, but a bit thinner. It offers less drop protection but isn’t as bulky as the Photo Case.
Last is their “Filmmaker Case”. Moment created this one primarily to be a mounting mechanism for their lenses when a phone with a Photo Case wouldn’t quite fit into a gimbal or drone controller (the Thin Photo Case didn’t exist yet).
As a result, the Moment Filmmaker Case doesn’t really offer any drop or front screen protection, but instead just wraps around enough to grip onto the phone and still allow lenses to mount.
But this also means that you can connect Lighting accessories that otherwise would not fully plug in due to the Photo Case’s molding, for example. I can’t use my Lightning port splitters with the Photo case, but the Filmmaker case (and probably the Thin case, I haven’t tested yet) allows these splitters to plug in without issue.
Unfortunately, it’s been discontinued and replaced by the Thin Photo Case, which is most likely a better choice for most users.
Just as a bonus, the last case that Moment now offers is their “Bio Case“. This is a mount-less case-only design made out of plant-based, compostable material. It’s basically the Thin Photo case without an M-mount and made out of eco-friendly plastic.
Best filters and filter mounts for iPhone video and Moment lenses
Choosing the right ND filter and circular polarizer for your iPhone video kit can be a bit daunting. Historically, ND filters were either super expensive or optically flawed. Thankfully there are some great options available now no matter your price range and video kit.
ND filters for iPhone video with Moment lenses
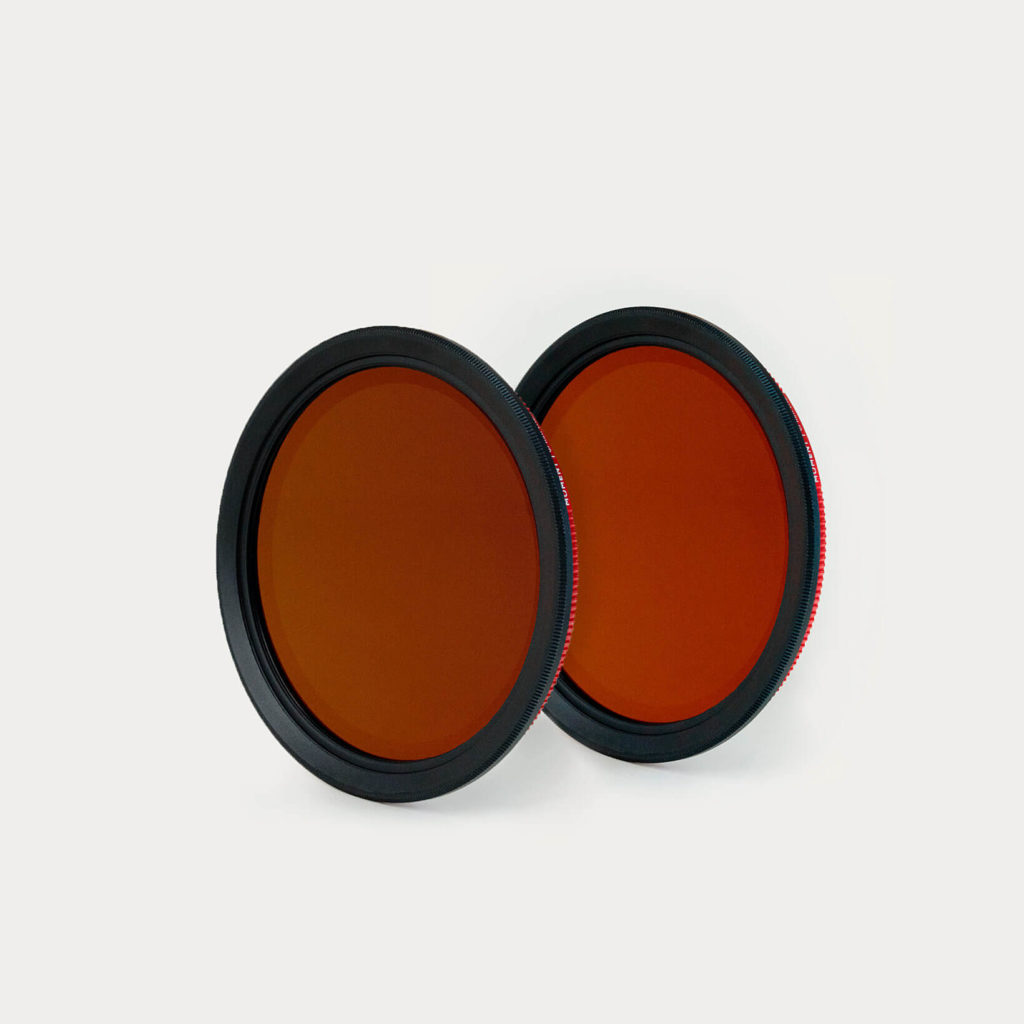
Moment has a new lineup of their own Moment Variable ND (VND) filters. These were initially available in 67mm, 77mm, and 82mm threads with 58mm, 62, and 72mm versions released later, and in 2-5 stop and 6-9 stop ND reduction versions. This aligns pretty closely with the quite popular PolarPro Peter McKinnon VNDs, as well as the more budget-friendly Freewell filters.
The Moment VND filters fall somewhere in between these two in price and performance to varying degrees. Each of these sets does have their own distinct color cast, something that’s unavoidable with any set of ND filters. The cast from each set, however, is minimal and won’t wreak havoc on your footage—as long as you’re consistent with which filters you use, of course.
If you’re on a tighter budget or just don’t think you’ll be using these filters as much, we would suggest the K&F Concept VND filters. At the prices of these filters, they absolutely cannot be beaten, and are excellent starter filters.
We would advise getting the 62mm or 67mm size if you don’t really plan on using this filter with a DSLR or mirrorless with larger lens threading, or the 77mm if you do plan on this. 77mm isn’t going to fit all lenses (especially some of the Canon RF-mount lenses) but will fit a vast majority while not being too heavy for the current crop of smartphone gimbals.
You can adapt a larger filter to fit smaller filter mounts with step-up rings. These are usually in a set that begins with a small size, such as 49mm that adapts to 52mm, and then one from 52mm to 55mm, so on and so forth up to a larger 77mm size.
We like these Fotodiox metal step-up rings for the price, and they work quite well for the purpose of putting larger filters on the Moment 62mm Lens Filter Mount.
Circular polarizers for iPhone video with Moment lenses
You’ll find the same sort of drawbacks to inexpensive circular polarizers as with ND filters—color casting, vignetting, and reduced light transmission. But thankfully polarizer filters aren’t as egregious as their ND brethren.
For the money, you can’t really go wrong with the Hoya NXT Plus line of filters. They’re available in pretty much every filter size you could need, and the optical quality is excellent. Yes, some may argue that you can’t beat the B+W filters, but they’re also at least twice the cost.
Just like with the ND filter, you’ll want to buy a larger filter size and use step-up rings to adapt it to the size of your lens or filter mount. Thankfully with the Hoya NXT Plus filters, you can get even the larger filters at reasonable prices.
Using filters and filter mounts for iPhone video with Moment lenses
While Moment lenses don’t have their own thread mounts, they do have a 62mm filter mount available. You can thread your filter on to the filter adapter, attach the appropriate filter adapter insert to match the Moment lens you’re using, and then just slip it on. The fit is really snug and stays right in place.
From here, you’ll have the ability to use any 62mm filter directly over your Moment lens of choice, or get step-up rings to allow mounting larger filters like 67mm, 77mm, or 82mm filters.
In our opinion, the selection of 62mm ND and variable ND (VND) filters aren’t necessarily the greatest, so we would definitely advise using a series of step-up rings to get to the aforementioned larger filter sizes from Moment.
We actually advise getting larger filters than what these mounts are accepting, primarily because your filters can be used on other cameras if you end up upgrading to bigger camera setups, or Moment releases different size lenses or adapters.
ND and circular polarizer filters specifically for iPhone video without an external lens
If you can’t afford Moment lenses but still want some control over your footage, Moment does offer a lens mount adapter for use without an external lens. This is an M-mount 37mm filter mount adapter that attaches to the normal Moment cases and provides a 37mm filter thread. They offer the mount, a circular polarizer filter, an ND filter, also available as a complete set.
These are great if you don’t want to carry around extra lenses and just make use of the built-in camera lenses on the iPhone. If you just need to control light and don’t want to spend a bunch of money on lenses this is a great way to get started.
The downside is that these are not variable ND filters and are available in ND 4, 8, 16, 32, and 64 strengths. But really, the major reason why we wouldn’t suggest them is that they are not compatible with Moment lenses. For that, you’ll need the 62mm filter adapter.
Best gimbal for iPhone video for most people: DJI Osmo Mobile 3
The DJI Osmo Mobile series of smartphone gimbals have been out for a while, and are extremely popular. The DJI Osmo Mobile 3 is arguably their best design so far, and also their most portable. This little gimbal actually collapses in on itself to pack away to an absolutely tiny size, making it our new best gimbal for most people, regardless of phone.
The motor on the Osmo Mobile 3 is actually pretty strong despite its diminutive size and can even stabilize the iPhone 11 Pro Max without any issue. It’s not as strong as its larger siblings and other brands, however, and has limited compatibility with Moment lenses and other accessories (be sure to check Moment’s compatibility spreadsheet for Osmo Mobile 3 and their devices).
Fortunately, it’s also pretty much the only mainstream gimbal on the market that doesn’t get in the way of the iPhone 11/Pro/Pro Max built-in ultrawide lens. Our other pick below gets in the frame, but the Osmo Mobile 3’s clever new redesign stays helpfully out of the way no matter which iPhone lens you’re selecting.
The smaller size and design does, however, bring in some other issues. You can use Moment’s 37mm filter mount without problems, but 62mm filters don’t fit. The design also completely eliminates the possibility of using the Moment universal gimbal counterweight, which further reduces the number of lenses and filters that work with this gimbal.
And finally, it doesn’t currently have Filmic Pro hardware controls support, unlike previous Osmo Mobile devices. It’s not a huge drawback, but hardware control is helpful and we hope to see that Filmic Pro can get their app updated sometime soon.
That may sound like a lot of negatives, but it’s really just nitpicking. Even with all that said, we still suggest it for most people. Most people won’t be stacking on giant ND filters and the heavier Moment lenses. If all you want is a gimbal to pack in your everyday carry and perhaps a few lighter accessories this is absolutely the best gimbal for most people.
Best gimbal for iPhone video with most external lenses/filters: Zhiyun Smooth 4
But what about those of us who aren’t “most people”? What if you have a need for heavier lenses, filters, and just prefer an overall larger gimbal and hardware controls? Fear not, we’ve got a choice for these users as well, and it’s the tried-and-true Zhiyun Smooth 4.
We know that this is a bit of an older gimbal and it’s not without its issues, but we still feel that it’s the best overall gimbal for power users without getting into larger gimbals meant for smaller DSLRs and mirrorless cameras.
Yes, it does get in the way of the iPhone ultrawide lens, but you can work around this by scooting the phone out further than it normally sits—you may need to use the Moment counterweight in this configuration, but it’s available.
That said, if you’re really looking for the best quality possible and need the extra beef that the Smooth 4 provides you’re probably already using the Moment Wide 18mm lens anyways, so, problem solved.
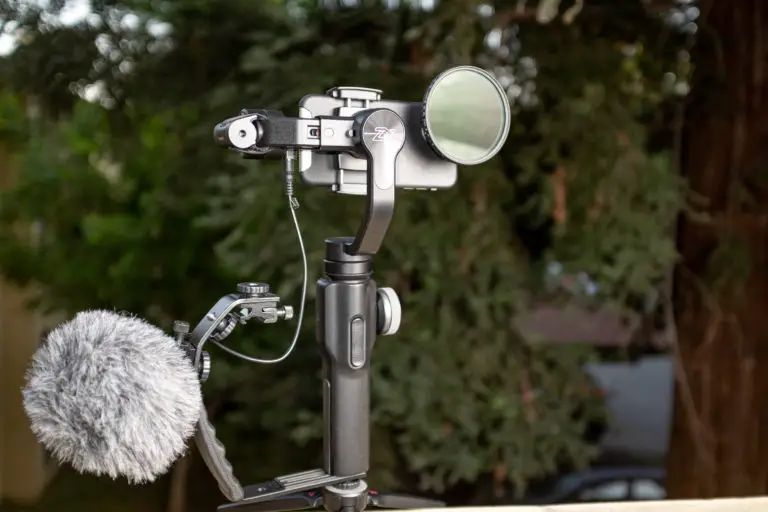
The Smooth 4 actually does work with pretty much every lens in the Moment lineup, however, with a few requiring the counterweight. It’s also got the motor strength to slap on a larger filter mount and ND filter as long as you have the Moment universal gimbal counterweight (not as large a filter as shown below, but close!). It’s actually kind of obscene just how ridiculous you can kit out the Smooth 4 with some lenses, ND filters, the counterweight, cold shoe bracket, mics, and splitters. Also, it’s worth checking out the Moment counterweight compatibility guide for details on various configurations.
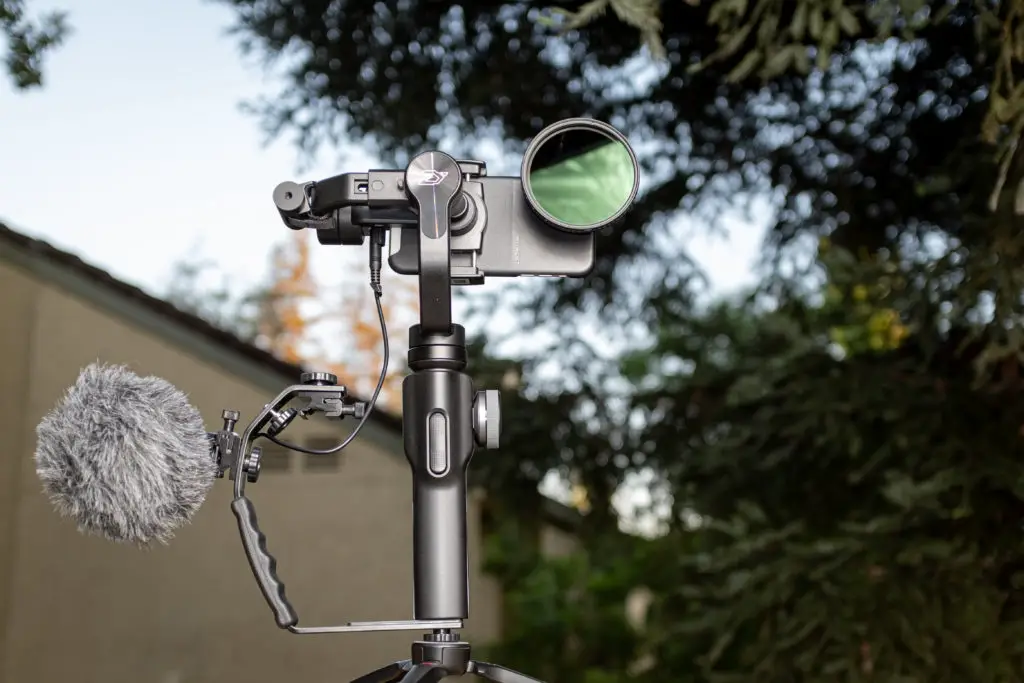
We personally were able to get the Smooth 4 to balance with the Filmmaker case on an iPhone 11 with the Moment Anamorphic lens, Moment 62mm filter adapter, Fotodiox 62mm to 77mm step-up ring, a K&F Concepts VND filter, the full Moment universal counterweight, a Lightning to 3.5mm right-angle adapter with a Rode Video Micro attached on a LimoStudio camera bracket, with the Smooth 4 tripod mount below it. But only barely. And we REALLY mean BARELY.
| A note about overloading a gimbal: You’ll notice that the motors get hot. This is a bad thing, and you’ll want to avoid it. If you notice the gimbal motors are too hot after a short period of time, stop using it, and make the payload lighter. |
It was able to keep the stabilization once we used the extra weight of the Rode mic cable facing down, but it struggled. If you’re just making small smooth movements it’ll work, but anything other than that and it will lose the fight to keep the motors stable. If we were using a smaller Moment 67mm ND filter, however, it shouldn’t have any issues.
What else makes this gimbal stand out? Well, Filmic Pro does finally support native hardware control on the Smooth 4, including zoom and focus pulling, and it actually works quite well. The battery life is rather excellent and it even charges via USB Type-C and can charge your phone from the gimbal while in use as well.
You’ll also find all the requisite gimbal features here, such as time-lapse, hyperlapse, roll mode, and vertigo mode. The Zhiyun XY Play app can be used to control these features directly, however, it’s not always the easiest app to get around in. Also, you won’t have access to the more specific shooting options like LOG and some high frame rate stuff, but if you need motion tracking or vertigo shots you’ll be using their app instead of Filmic Pro.
So yes, while we suggest the DJI Osmo Mobile 3 for most users, power users will love the Zhiyun Smooth 4. It’s larger size and compatibility with the Moment counterweight means you can slap nearly any combination of lens and smaller filters and have an excellent stabilized mobile filmmaking rig. We’re looking forward to seeing their next iteration but until then the Smooth 4 is our go-to for most bigger setups.
Best gimbal for iPhone video with large external lenses/filters: Freefly Movi Cinema Robot
If you need large DSLR-sized filters, however, we’d suggest the Freefly Movi Cinema Robot along with the Moment Movi counterweight set. These are also available as the Freefly Movi Filmmaker Set for a bit of a discount. The Movi is more expensive than most other gimbals but does support a heavier payload.
The Smooth 4, for example, maxes out at a 210g payload. While the Movi doesn’t have an officially announced payload, between what Freefly has said and the community testing payload limits, it’s somewhere between 414g and 1000kg.
This should easily handle a large 77mm VND filter on a Moment Anamorphic lens, but it will probably take some extra calibration to work as expected.
If you don’t mind jumping up to a larger gimbal, such as for a small point and shoot or mirrorless camera, you could always check out the Zhiyun Crane M2 or the DJI Ronin-SC. Yes, they’re definitely the definition of overkill for a smartphone video kit, but you can’t worry that they won’t support a large iPhone video setup.
Best non-gimbal phone grips or stabilizers for iPhone video
Shoulderpod G2
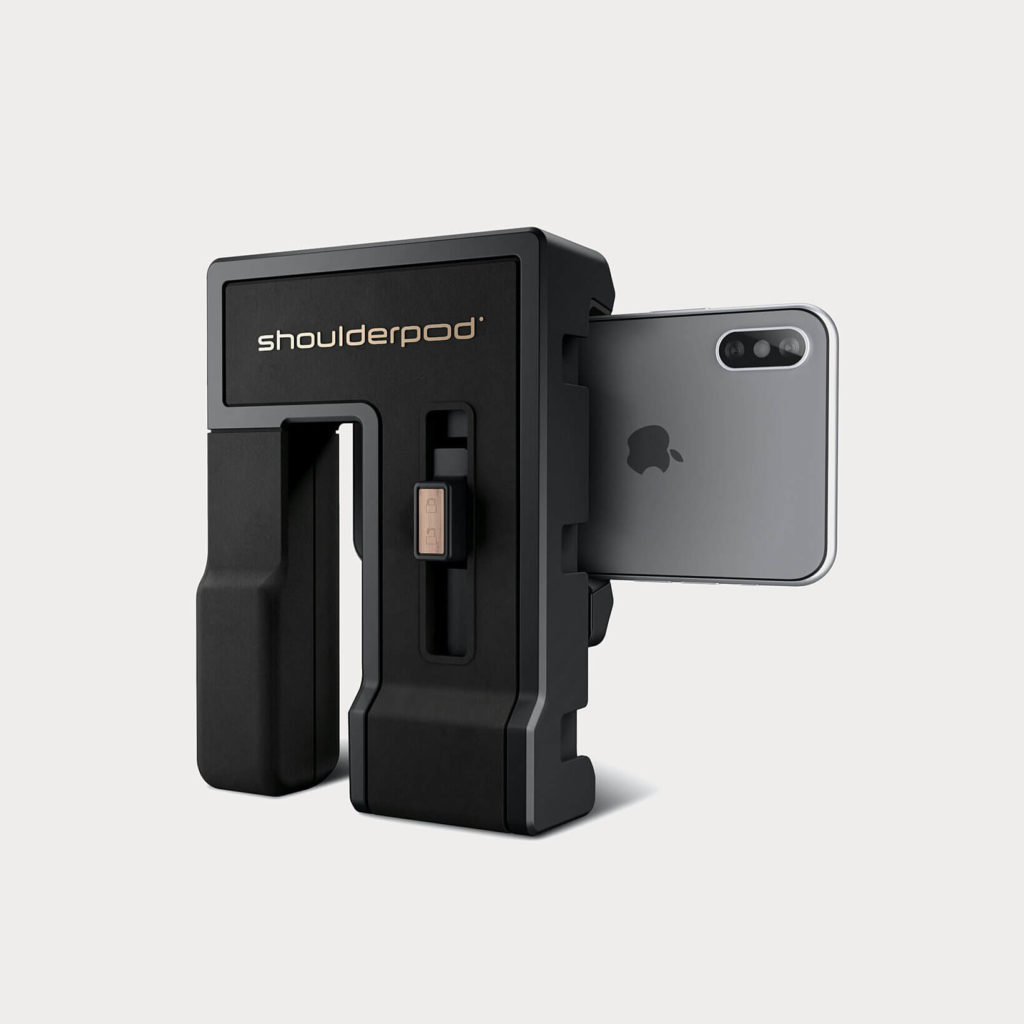
At first glance, the Shoulderpod G2 iPhone video grip looks, well, weird… It seems like it’s shaped in a way that doesn’t make much sense. But after thinking about it a bit further, it really is well designed.
While the square shape was at first a bit weird, this actually makes it quite easy to switch from landscape orientation to portrait for creating Instagram/IGTV or Tik Tok content, or live streaming on Facebook. Most other grips or cages are made to solely be held in landscape, and as much as some of us don’t like it, vertical video is here to stay in some apps.
Thankfully there’s also plenty of cold shoes available for accessories to be mounted—six, to be specific. And there are two tripod mounts, one for both portrait and landscape orientations.
But the best part of this grip really is the clamp mechanism. You can fit virtually any phone in the clamp (with case!) extremely easily thanks to its slide design. You’ll also find a Smart Brake to ensure that your phone won’t go anywhere once it’s clamped in place. After working with other phone clamps that have a knob for adjusting the clamp position, we have to say that this is just way easier.
There are definitely less expensive (and more expensive!) grips out there, but we think that the Shoulderpod G2 hits a great combination of price, features, and build quality.
Shoulderpod S2
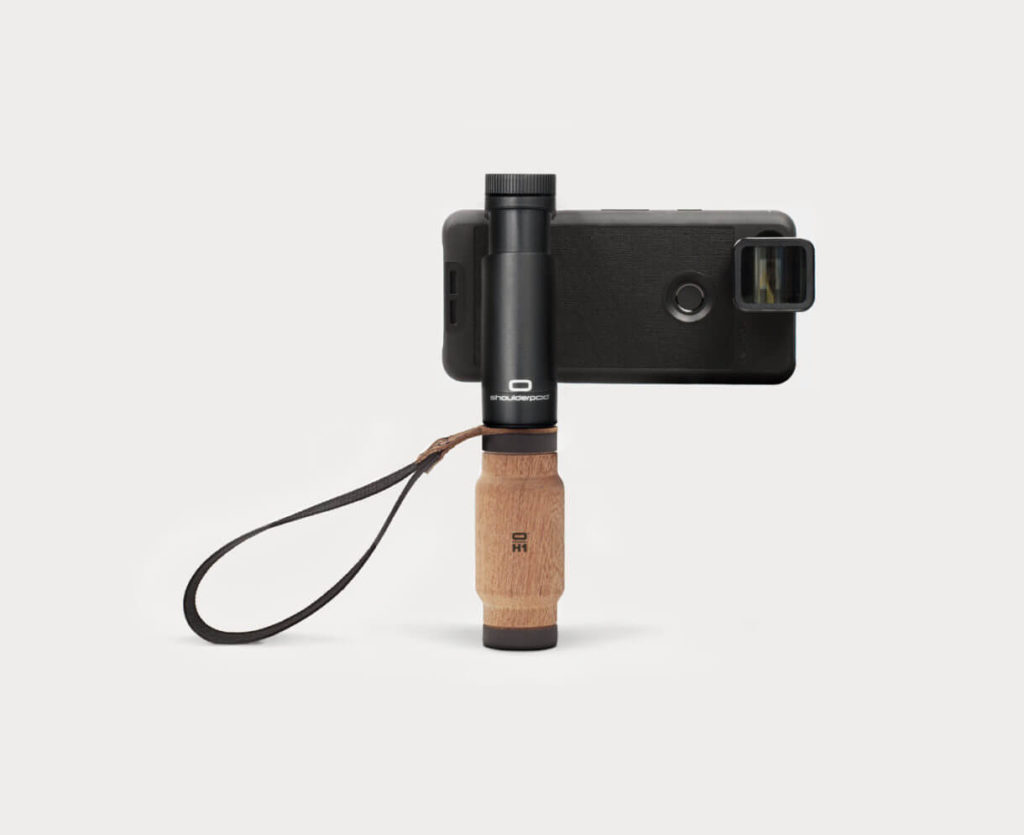
Where the G2 is a somewhat larger, full-featured grip, the Shoulderpod S2 iPhone handle grip is the exact opposite. The S2 is a basic phone grip with a wooden handle and a strap. That’s it. Oh, and tripod mounts, thankfully.
The more basic nature of this grip makes it extremely easy to throw in a pocket or small bag and carry with the rest of your daily gear. You never know when you may need some sort of phone grip and this one fits the bill for lightweight work and unplanned scenarios.
You can mount either the phone grip or the handle to a regular tripod mount, which is a reason why we keep one in the bag at pretty much all times.
Best portable battery for iPhone video kits
Our pick for fast charging: RAVPower 20000mAh USB PD/QC3 Portable Battery Bank
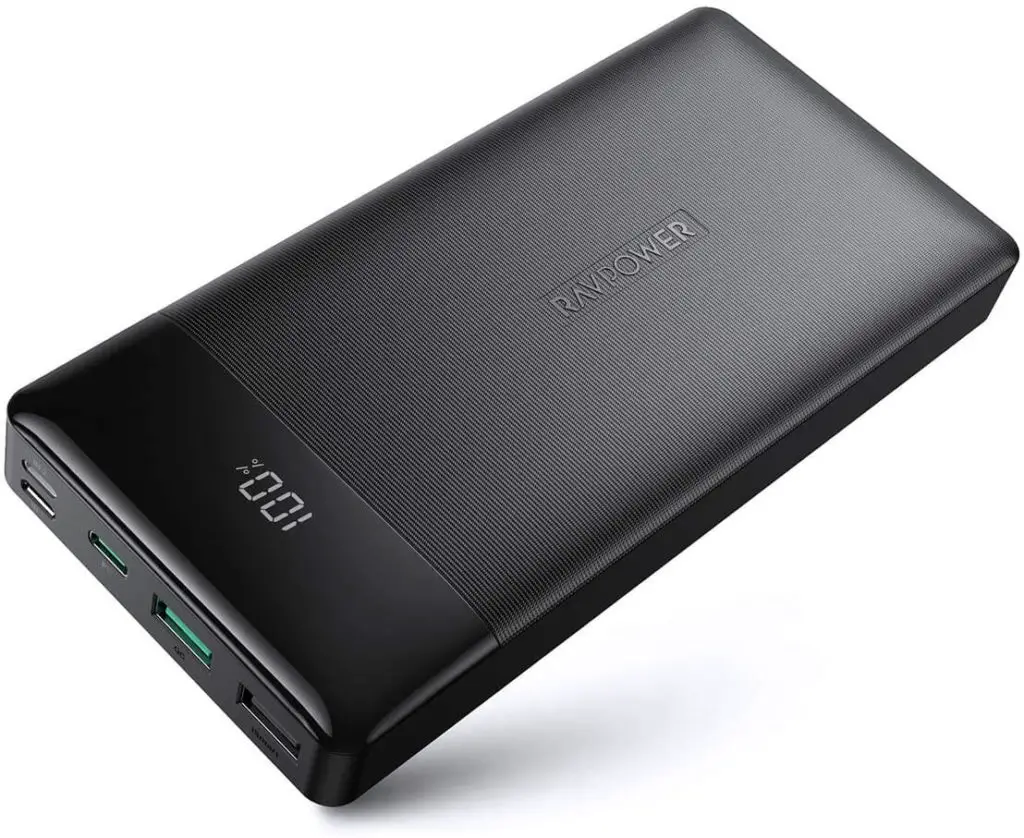
If you need a lot of power and a lot of I/O for charging, this RAVPower 20000mAh USB PD/QC3 Portable Battery Bank is the current favorite. It’s a bit bigger than others but quite small for the total capacity.
What you’ll get, however, is pretty great. This battery has it all: 18w of USB PD (Power Delivery) over Type-C, QuickCharge 3.0 over USB Type-A, and can charge up with either the USB Type-C, USB Micro-B, or even Lightning.
No matter which charger you have with you, you can always top this battery off, and you’ll know exactly how much power you have left thanks to the built-in screen showing the remaining capacity.
You’ll also be able to charge up your iPhone or iPad at a full 18 watts with USB PD, and Android devices that support QuickCharge 3.0 will also get juiced up quite fast.
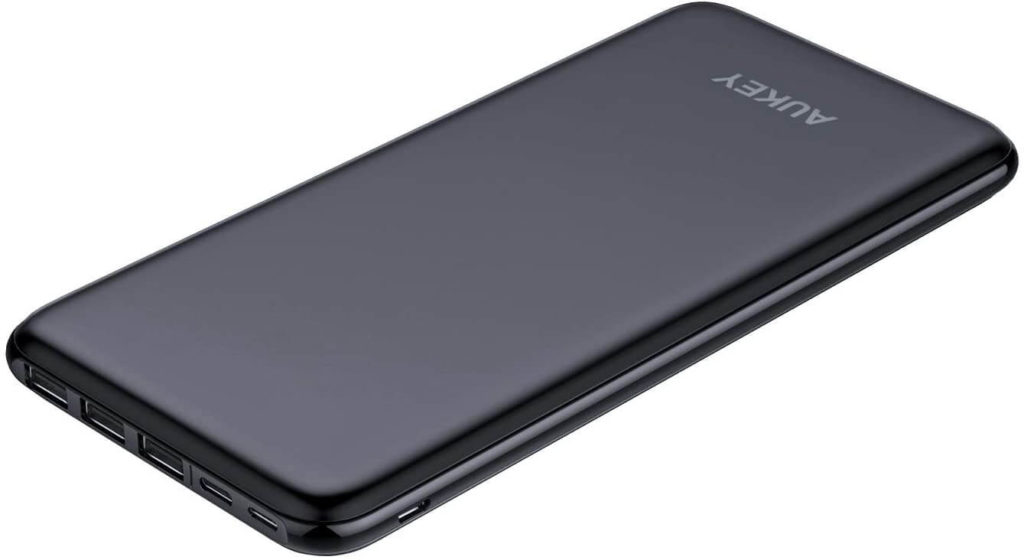
Our pick for slim batteries: Aukey USB Type-C 20000mAh Slimline Battery
We love slimline battery packs, but usually, they’re a bit light on the inputs and outputs and don’t pack as much juice as their thicker brethren. This Aukey USB Type-C 20000mAh Slimline Battery bank, however, defies all of that.
This 20000mAh power bank is our current favorite slimline battery bank for high capacity and high compatibility. You’ll find three USB-A outputs, a USB-C input/output, a Micro-USB input, and a Lightning input.
What you won’t find, however, is USB PD. It makes sense in a device this small with such a high capacity though, so we’re not upset about it (Aukey does have a 10000mAh unit with less I/O but offers 18w of USB PD if you need that in a slim package).
While we think that the larger RAVPower device is worth the size increase because of USB PD, for those who are packing light the Aukey slimline bank is a great choice.
Best bags for iPhone video kits
We’ll be the first to admit that we’ve got a weird obsession with backpacks. We have way too many in the search for the perfect backpack, but the perfect backpack isn’t the same from person to person.
It’s in this regard that we don’t have one end-all, be-all recommendation for the best backpack for your iPhone video kit simply because your kit will often look different than ours, or anyone else’s kit.
Moment does carry a pretty wide selection of camera backpacks, slings, and other cases both under their brand and from other manufacturers, and we’d suggest taking a look through their bags to see what catches your eye.
There are a few bags that we think stand out for certain purposes, however, especially when it comes to storing specifically Moment lenses, filters, and other gear.
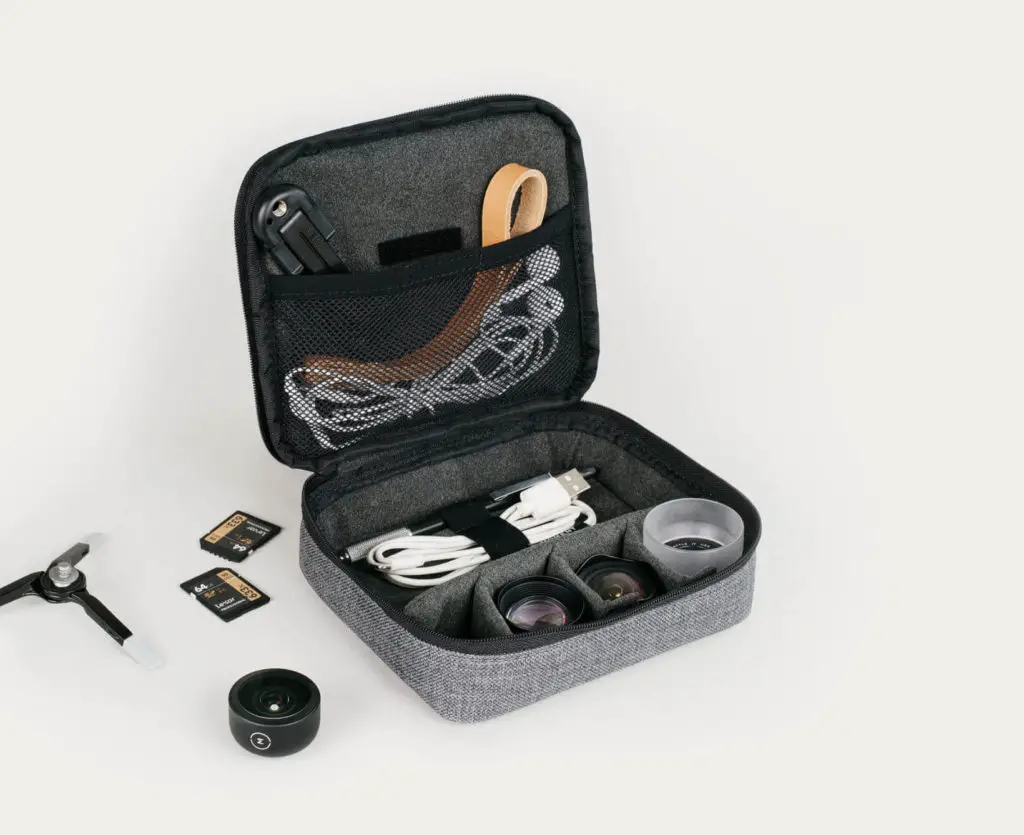
If you already have a backpack or camera bag you like, you may just want to get a lens carrying case or lens roll for your Moment lenses. These can be stowed in your existing bag without issue and keep everything organized and safe.
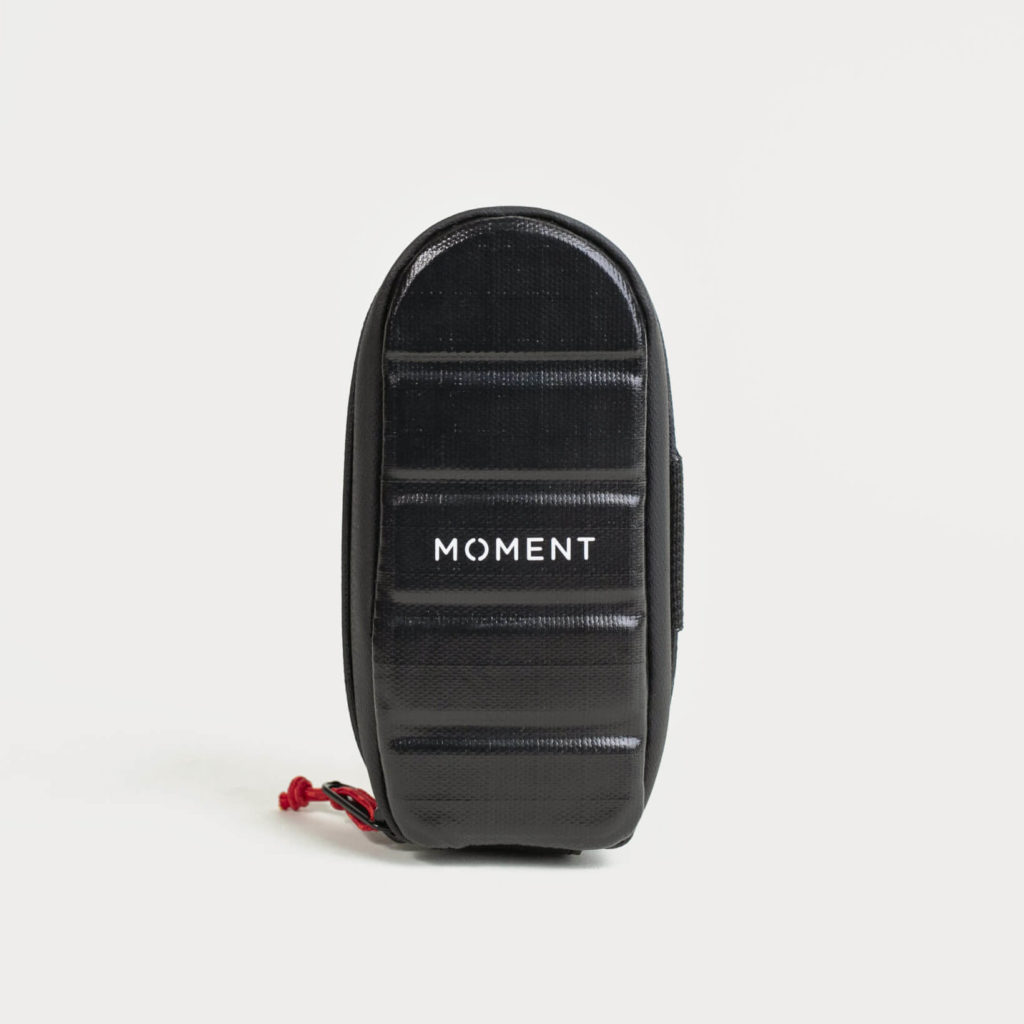
But if you want to keep your lenses accessible outside your bag, you could pick up a dual-lens zipper pouch to attach to your bag’s sling or backpack straps. This way your lenses are always accessible if you’re constantly changing lenses.
And of course, Moment makes a series of fanny slings for those who either want to relive the 90s (or just aren’t aware they existed). The Moment fanny slings actually make pretty decent iPhone video kit bags with a ton of organization and dividers. Again, if you’re the type who can get past the stigma of fanny packs in the 90s (we were there, we know!).
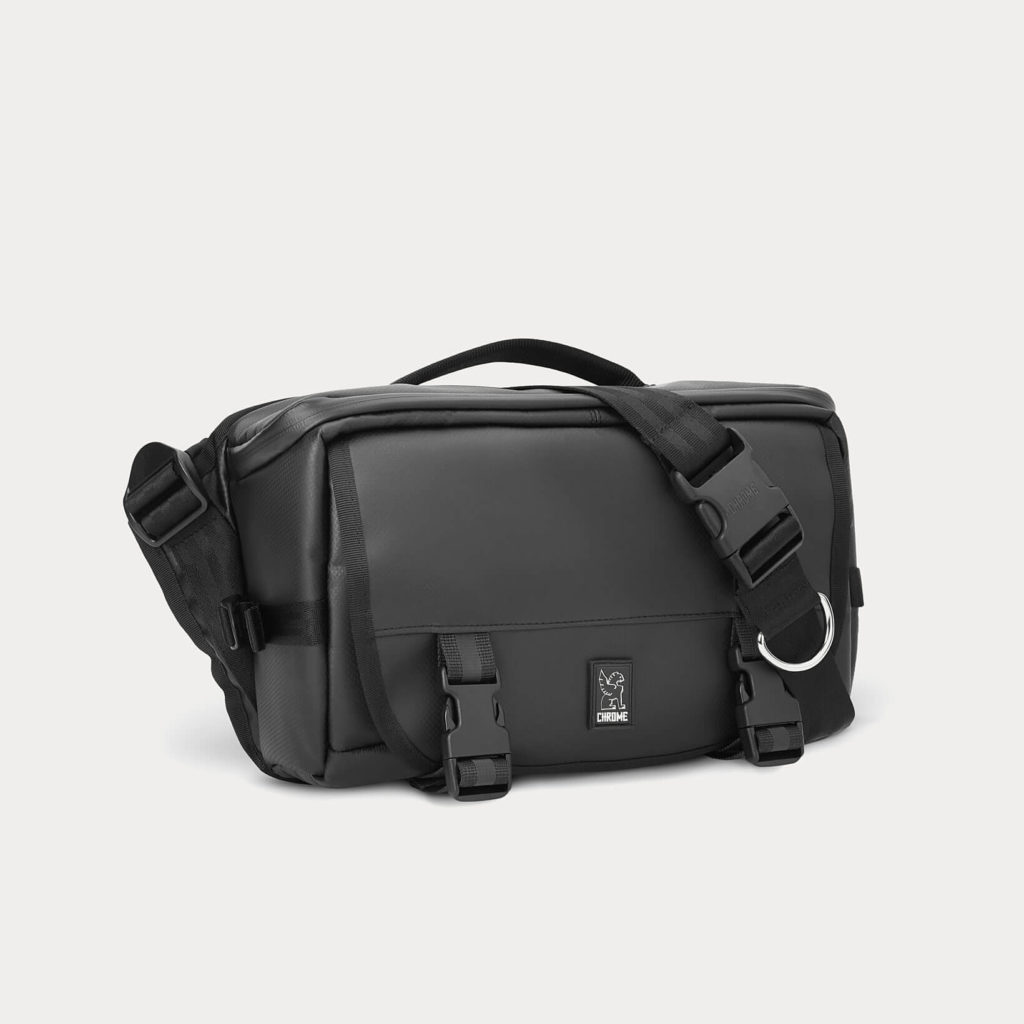
That said, we really do like the sling style camera bags. After wearing huge photo camera bags for so long, it’s nice to slim down the kit to fit into a small sling bag. The Chrome Niko Camera Sling V2 is a great bag for exactly this. It’s a bit pricey, but it’s built well and holds tons of gear. You can customize the dividers to your needs, and there’s plenty of access to all sorts of equipment.
Moment just announced a new full-size camera bag, the Rugged Camera Sling. While geared to hold a selection of DSLR or mirrorless camera lenses, it would also work quite well for an iPhone video kit bag and is priced better than the Chrome Niko above–albeit with less customization, of course.
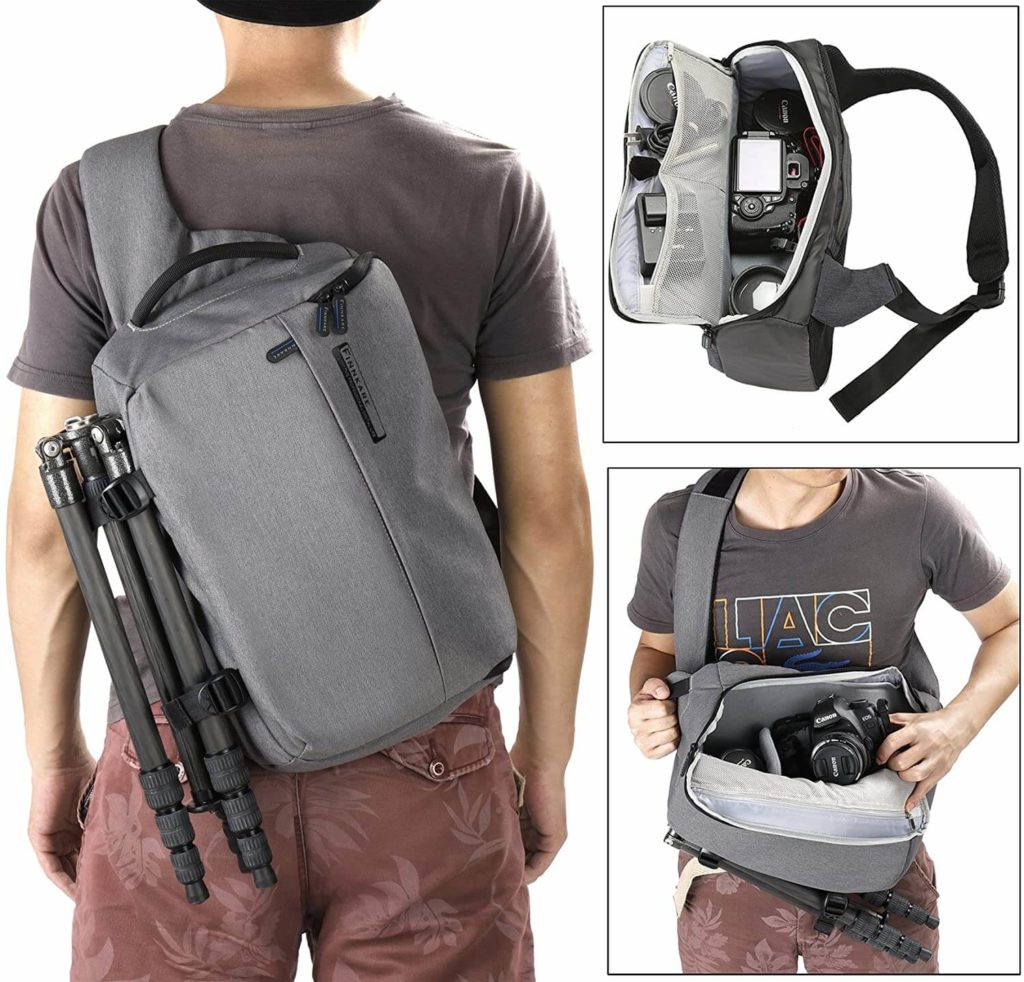
We also found an excellent inexpensive Finnkare shoulder sling-style camera backpack, which is large enough for a DSLR or two but we picked up with the intention of using it for our gimbal/smartphone video kit. It’s not the most customizable, but if we were to add in some extra velcro dividers it could really be great. We have, however, taken it on multiple trips and it’s been pretty great for when the full camera bag isn’t needed.
DSLR vs phone camera
Smartphone video is getting really, really good. And while we can shoot 4K60 footage with the little black slabs in our pockets, it still can’t stand up to the sheer sensor size available in a DSLR or mirrorless camera. Maybe someday, but that’s quite a ways off.
Larger cameras like DSLRs and mirrorless cameras have a few major benefits. Larger size bodies mean larger size sensors, which means better light sensitivity, longer flange distance for more shallow depth of field, and bigger, more quality lenses are available.
What this really equates to is less noise in your video (especially in low light) thanks to the larger sensor, better background blur and bokeh thanks to the flange distance, and sharper images due to the larger, more high-quality glass in high-end lenses.
Yes, you can get lenses for your iPhone, light things a bit more, and generally work around these differences, but if you absolutely need cinematic video, you’ll want a cinema camera. You’re not going to get your iPhone footage matching an Arri, Alexa, or even a Blackmagic Pocket Cinema 4K. You can get close(ish), but not quite.
That said, you can still get excellent footage out of your camera—you just need to know how to use the tools you have to their best potential, work around the drawbacks, and keep your expectations tempered accordingly.
Best iPhone video app: Filmic Pro
Hands down the most popular video camera app for iPhones (and Android) is Filmic Pro (App Store | Google Play). It’s not cheap, but the amount of features and power it brings to mobile filmmaking is unmatched. Filmic Pro will allow you to take full manual control over your phone’s camera—shutter speed, aperture, focus, ISO, white balance, you name it.
Filmic Pro filmmaking features
You can actually run Filmic Pro in various auto or priority modes, just like you would with a DSLR or mirrorless camera, allowing for ease of use in quick situations as well as locking down manual settings for more deliberate scenarios.
The app also provides filmmaking tools to help get the right shots. The live view analytics included in the app will give you zebra stripes for viewing exposure, a clipping overlay, contrast peaking for nailing focus, and even a false colors overlay for confirming exposure.
Perhaps the best feature, however, is the support for LOG recording. There are a few picture profiles, such as Standard, Natural, Flat, and LOGV2. The LOG profile will provide extra dynamic range and provide a very flat image for more possibilities in the editing/coloring process.
The LOGV2 profile does require purchasing an additional in-app purchase, however, called the Cinematographer Kit (in-app purchase). It’s an excellent profile and is worth it if you need LOG capability. At this point in time, there really isn’t any competition to this feature from any other app, so if you need LOG footage from a phone the Filmic Pro Cinematographer Kit is your only option.
You may run into some issues where you won’t be able to use the LOGV2 profile while operating in higher resolutions and/or frame rates, so you may be a bit limited at this time, but we hope to see these limits be adjusted with further updates making use of the newer A13 chips in modern iPhones.
There are a host of other useful features as well, such as the ability to choose a wide range of frame rates, bitrates, audio resolution, and even footage cataloging by name/shoot/take.
Almost anyone who is serious about iPhone video uses Filmic Pro at least some of the time. While it doesn’t necessarily create the same results as the insanely good Smart HDR from the native camera app, what it does provide can’t be found anywhere else. If you need full control of your video footage, Filmic Pro is usually the right choice.
Filmic Pro hardware support
Filmic Pro also has built-in support for a variety of external hardware. The DJI Osmo Mobile 1 and 2 gimbals are supported, as are the Zhiyun Smooth 4, and the Movi Freefly. Of course, any gimbal will work with Filmic Pro, however, some will have dedicated hardware controls that will operate the app functions without needing to touch your camera.
You’ll also be able to use external microphones, whether via the 3.5mm headphone jack (if you still have one, that is) or the Lightning port (or USB-C on Android).
Perhaps one of the coolest pieces of hardware that Filmic Pro supports, however, is an anamorphic lens. These are special lenses that capture a squeezed together 16:9 image that can be “desqueezed” out to a 1.33x format, such as 2.35:1, which is about 33% wider than a traditional 16:9 widescreen ratio.
Anamorphic lenses produce some very cinematic footage because of not just the aspect ratio, but also the way they deal with light sources and flares. Certain visual characteristics of film/video is also different, such as bokeh (blurry points in the background) being oblong or oval instead of circular like a regular lens would create.
In addition to the anamorphic lenses, you’ll still be able to use other lenses that don’t require desqueezing as well. Wides, teles, macros, and more, Filmic Pro will definitely support these lenses.
Best iPhone/iPad video editor: LumaFusion
It’s incredible to see how much power is packed into modern smartphones and tablets. The past few generations of iPads and iPhones can definitely stand toe-to-toe with laptop-based editing for the vast majority of editing needs. No, you won’t be processing complex motion graphics or editing 8K footage in most cases, but you can definitely edit 1080p and 4K footage on modern iPhones and iPads, and the best iPhone/iPad video editor according to most people would be LumaFusion (App Store).
I’ll be honest, I’m definitely a bit new to LumaFusion, having just recently started testing it out. But it’s an insanely powerful editor and is extremely intuitive if you’re familiar with even the most basic editing concepts.
LumaFusion isn’t a stripped-down editor like you may be familiar with on mobile platforms. You can work in the same timeline method you’re accustomed to on a full editor like Premiere Pro or Final Cut, making it a pretty quick adjustment period.
As of the time of writing this, you get 6 video/audio tracks to work with, and an additional 6 audio tracks for whatever you may need. You still have access to keyframing, titles, effects, tons of export options, and even media library options for both on-device and external storage.
The one feature that is most likely to be missing for a lot of YouTubers and filmmakers would be speed ramping. Yes, you can work with clip speed and get slow motion from up to 240fps video clips, but you won’t be able to “ease” in and out of those speed changes without creating multiple clips at multiple speeds to give the feeling of ramping in and out. We hope to see this added in soon, perhaps similar to the speed curves available in Davinci Resolve.
But even with this one issue that won’t affect nearly all users, LumaFusion is a can’t-be-beat editing solution that shines on iPads, especially the iPad Pro. We can only imagine it will get better with the latest iPadOS update providing mouse and keyboard support, so we look forward to testing this out as well.
Making movies with iPhone
By “movies” we don’t necessarily mean actual films—most content creators are making YouTube videos, short films, vlogs, and other video products that are quite cinematic. Yes, you absolutely can shoot films on an iPhone, but we’re not just referring to the next David Soderberghs amongst you by any means.
In order to get your iPhone video looking as good as it can, you’re going to need a few things, such as a good camera app that allows you to shoot with manual settings, a good camera grip or camera mount, a tripod, and perhaps some lenses to bolt on to your camera.
While you can definitely get some great results out of the built-in camera app and use the lens(es) on your iPhone alone, adding this more specialized iPhone video equipment will help make your life easier both at the time of shooting and during the editing and post-processing.
If you’re not sure about what some of the gear we’re talking about is or why you would want it, keep on reading and we’ll walk you through it after our suggestions.
What gear would you need for iPhone video and filmmaking?
After looking at some specific equipment that we really love for iPhone video and filmmaking, let’s take a quick beat to go over some of this gear you may want in a bit more detail. None of this is mandatory or required, but they do help enhance your videos and some serve a very specific purpose while others are more all-around devices.
Lenses
Your phone’s cameras may have up to a wide main lens, a tele zoom, and an ultrawide, but they’re not all created equal. On an iPhone 11 Pro, for example, the main wide is the best quality, and the other two are less sharp and detailed. You can use an external lens to replicate the ultrawide angle with the quality of the main lens. Or stack a zoom on the built-in tele and get in super close. Or even get a fisheye for wild skate-style videos.
Lenses will help you better tell your story, and get the field of view you’re imagining in your head when the built-in lenses don’t quite get the job done. Lenses aren’t required but can be fun and very useful in certain circumstances.
Stabilizers, gimbals, and grips/cages
Most people are pretty familiar with gimbals these days. Gimbals are the motorized three-axis stabilizers that keep your phone footage smooth and shake-free. They can help get more pleasing footage and smooth out handheld camera movements.
That said, gimbals aren’t perfect, and they do have a certain feel to the movements. You can tell when a gimbal is in use because camera moves sometimes feel a bit robotic and don’t have that human touch. But they’re quite easy to use for beginners and can really turn out some excellent results with an experienced operator.
There are counterbalance-based stabilizers that don’t have motors. These balance the camera up top and have a weight hanging down on a ball-bearing-style pivot. They’re harder to balance, but are usually more cost-friendly. They have a longer learning curve, and honestly, we’d probably suggest just using a gimbal instead of small handheld non-motorized stabilizers.
Especially in years past, you can find a lot of people using a Glidecam-style stabilizer. These are larger versions of counterweights and are typically more used with DSLRs and larger cameras than a phone because they’re tough to balance without much weight on them. Even our small mirrorless-size Glidecam struggles to balance with a smartphone mounted. But they can produce amazingly smooth camera moves with some practice, and they don’t feel so impersonal as a gimbal can once you get the hang of it.
On the fully manual handheld side of things, you can get a grip mount or cage style grip. This device is fully handheld and there is no stabilizing mechanism or motors. It’s just a phone mount with a frame and some handles—you provide the stabilization. You can also mount mics, lights, and other devices on the built-in cold shoes, and there’s really no weight limit to what lens and/or filter combination you decide to use. These are excellent for shooting music videos and documentaries, especially if you need a ton of extra gear mounted to your phone.
Neutral density (ND) and variable neutral density (VND) filters for iPhone video
When it comes to filters for your iPhone video kit (or your DSLR/mirrorless video kit), we really recommend two types of filters for improving your footage: A neutral density (ND) filter and a circular polarizer filter (CPL). These are the go-to filters for most photographers and videographers, and can really do wonders for your footage.
If you’re shooting outdoors you may find that the light is just too bright to get your desired shutter speed, aperture, and ISO. An ND filter—or neutral density filter—can resolve this. ND filters are basically sunglasses for your cameras.
Using an ND filter allows you to run at a lower ISO, open up your aperture to get the desired depth of field, and still run at a 180-degree shutter speed (48 or 50fps if you’re shooting a 24p project, for example). You can get ND filters in both fixed stops or variable filters that allow you to dial in the exact amount of ND you need for your shot.
You’ll notice that ND filters will be listed as “5 stop” or “ND2 to ND32”, and that you’ll see that there are often two different strengths of filter available. Due to engineering constraints, manufacturers now tend to make two separate strengths of filters to avoid the cross-polarization “X” pattern that occurs on lesser filters and those without hard stops.
When you rotate a VND filter too far, it creates this weird “X” pattern, ruining your footage. Providing two separate versions along with including hard stops in the rotation mechanism ensures that you can’t turn the filter too far, and there are not enough ND degrees to result in the X pattern.
Circular polarizers (CPL) for iPhone video
Circular polarizers are also helpful. They can be used to reduce glare or reflections off of a metal surface, glass window, or water surface. You can also get some extremely deep blues out of the sky if you’re shooting perpendicular to the sun, and can really help dial in your visual tone.
Do you need a UV filter for your iPhone video kit?
The third common type of filters you may see around are UV filters. They’re common, but these have less of an impact on the quality of footage and aren’t really needed with digital cameras. UV filters were meant to act as a sort of sunglasses for certain film stock because of how sensitive film was to UV light.
Nowadays they’re mostly thought of as a sort of screen protector. If you drop your lens, you’ll more likely just break the UV filter instead of the lens’s glass, saving you a ton of money (hopefully). UV filters also cause more lens flares in an unpleasant manner, as opposed to an anamorphic lens’ pleasing flares.
Filter mounts for iPhone video
On a typical DSLR or mirrorless camera, filters usually thread on to the end of the camera lens. As most mobile lenses don’t have built-in threads, you’ll need a filter mount or adapter. Also, since some lenses are bigger than others, you may want to get a larger size filter and then some step-up rings to let you adapt this larger lens onto smaller filter mounts.
This means you can buy just one size of the filter and use it on all your lenses and cameras. You’ll see that Moment and other manufacturers all have slightly different sizes of mounts, adapters, and filters available. The typical suggestion is to buy a filter large enough to work on every lens on which you’d use the filter, as this is a cheaper way to buy gear.
From here, you can get either a larger size adapter or step-up rings that will gradually adapt from a smaller mount up to larger filter sizes. Step-up ring sets are more often found on DSLR or mirrorless video kits, but you can definitely make use of them with your iPhone video kit, and we’ve actually done exactly this. With one filter and step-up ring set, we can use our filters on all of the video equipment that we currently have.
iPhone video recording and editing software
The stock Camera app on iOS is great, but it doesn’t allow for full manual control or different cinematic picture profiles. It handles Smart HDR quite well, but won’t let you shoot in LOG. For that, you’ll want a dedicated pro-style camera app, such as Filmic Pro.
If you are editing on an iPhone or iPad you’ll need editing software as well. Yes, you can actually edit on the current iPhone or iPad hardware and it works quite well. It’s still not as easy as editing on a full editor like Premiere Pro, Final Cut, or Davinci Resolve, but there are some surprisingly full-featured apps such as LumaFusion, especially on an iPad.
If you prefer to edit video on a full laptop, this is definitely feasible even when shooting on an iPhone. You can actually use either a Windows or a Mac for your editing–you just may have different methods of transferring footage. If you’re not sure where to start with picking a laptop, check out our full guide on picking the best video editing laptop for your needs.
While we typically use OneDrive or Google Drive for transfers from Android devices and you can still use these on iPhones, the iCloud Photos transfer works well. It’s slow and doesn’t make transferring unmodified files as easy as it could be, but once you get past those iCloud will get the job done.
If you’re shooting in Filmic Pro in certain frame rates or profiles, you’ll want to transfer the unmodified files via the iCloud website and download the original files as to not have your files transcoded to lower quality files–transferring directly via the Photos app or via Airdrop will result in this in some instances.
Portable battery bank
If you’re out all day shooting footage (especially 4K) you’ll end up chewing through your iPhone’s battery. You’ll want to have a portable battery bank to keep your phone (and perhaps gimbal) going throughout the day. You may also want to pack a spare wall charger for when things get really going, but throwing these items in your bag are a must. Speaking of a bag…
Camera bag
Just with full-sized cameras, you may want to have a smaller bag for your iPhone video kit. Depending on how many accessories or lenses you have your bag requirements may differ from the next person, but it’s definitely crucial to have all your gear organized and ready to go.
You can get all your kit in a tiny shoulder or sling bag, including your gimbal, making your entire iPhone video kit extra portable and easy to work with.
What next: Learning iPhone video and filmmaking with online courses and trips
Now that you’ve put together your iPhone video kit and you’ve started experimenting with filmmaking, you may find that you want to push your skills further. Yes, you can go out and just shoot on your own, but online video lessons could help accelerate your growth immensely.
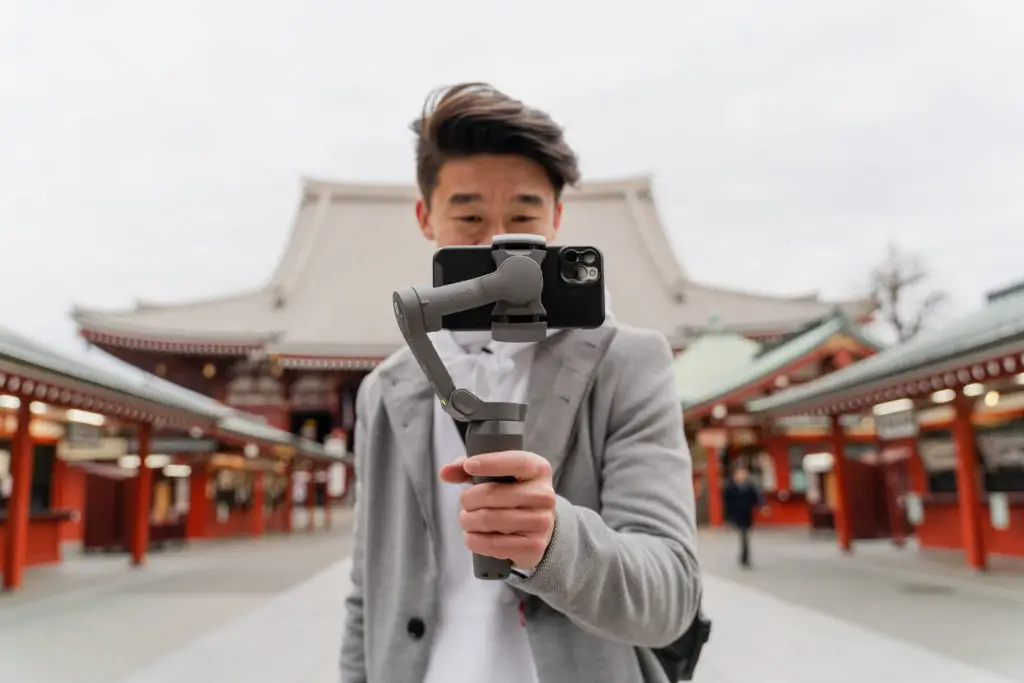
Moment has a wide selection of photography and videography lessons available on their site and they’re priced quite well. Some of the notable video-related lessons we like would be:
- Mobile Filmmaking: Learn to shoot cinematic videos with Andy To
- How to Make Short Form Videos for the Internet
- Capturing the Perfect Candid Moment Every Time (this is a photo course, but is quite applicable to certain filmmakers!)
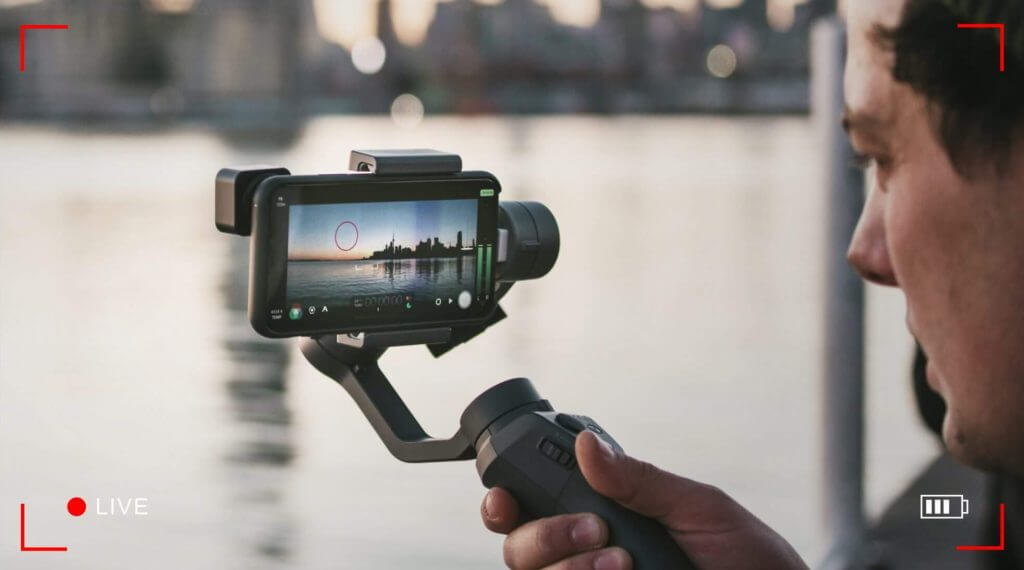
There is also an upcoming Online Filmmaker Workshop with live Q&A on June 26th, which also will provide a video-on-demand version of the workshop to rewatch after the live version.
Update: Moment is currently running a summer sale on lessons! Starting May 27th and running until June 26th, 2020, you can save 25% on one lesson, or 30% on two lessons, and this includes the lessons we’ve listed above. Check out the Moment sale page for all the details!
But what if video lessons aren’t quite doing it for you and you want to get out and have some incredible tours and guided lessons? Moment has you covered there as well with some really excellent and unique photo tour packages available.
The focus (again, pun not intended) of the Moment photo tours are, well, photo tours. So while the guides will be emphasizing photography, you can still get some great video, even with your iPhone video setup. This would be a great opportunity to vlog as you go through your trip and get even more content as you go through the photo tour.
Unfortunately, the world is going through a difficult time right now, and at this point, these tours may need to be rescheduled or postponed. But definitely keep an eye on the Moment photo tours page for more details as things progress.
Final thoughts
It’s absolutely mind-boggling when you think of how much power and creativity is at your disposal with just a modern phone. When you look at your options for building on to that phone with the right accessories and add-ons you truly do have a quite capable iPhone video kit that fits in a small bag or sling.
Whether it’s your primary camera for your YouTube channel or a secondary camera for use in short films, you can get a lot of great footage out of an appropriately kitted out iPhone. The only real limitation is your own imagination and creativity—nothing will take the place of that, so just remember that the real magic here is you.
Now it’s your turn. Anything here we missed? Is there a lens or piece of gear or technique that you find indispensable to your iPhone video kit? Did you have any questions about anything we’ve discussed? Be sure to leave a comment down below and let us know!




![Best Elgato Cam Link alternatives [2022]](https://www.creatorbeat.com/wp-content/uploads/2020/12/Creatorbeat-Best-Elgato-Cam-Link-Alternatives-Blog-265x149.png)


0 thoughts on “Best iPhone video kit: iPhone filmmaking with Filmic Pro [2022]”